
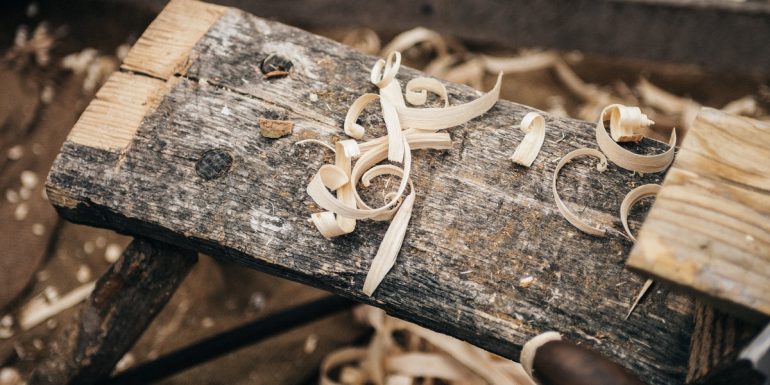
If you are into woodworking, then you are bound to have plenty of scrap wood lying around your workplace. Instead of disposing of the pieces or using them as firewood, you can create some unique projects.
Scrap wood projects are comparatively easier to make because they do not require heavy-duty tools. You can also keep your workspace clean by putting these leftover scrap woods to good use and even earn some extra cash.
In this article, we are going to talk about 10 easy scrap wood projects you can make any time you want.
10 Easy Scrap Wood Projects for Beginners
1. Chevron Boards
These are very easy to make, and you can sell them in sets of 3. You can sell each set from $20-$30. A chevron can be made by using 1×4 or 1×6 boards.
First, use a saw to create 30-degree parallel cuts on your 1×4 board. Put another board on top of it and make angles using the same measurement.
You will now have two boards to produce the triangle shape. You can glue the pieces together or make two pocket holes at the bottom and screw them together.
Last, use command strips or alligator clips on one side so that they can stick to walls.
2. Rustic Tray
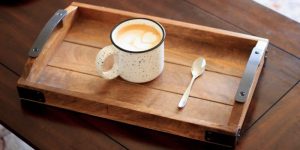
First, you will need to make a frame by joining four 1×3 strips together. Use your miter saw to make 45° angle cuts on the edges of your strips.
As for the base, use large plywood or join two 1×4 boards together with wood glue. Use finish nails to attach the frame to the base, make sure both the pieces fit perfectly, lastly, give the entire piece a nice rustic paint job.
For some more amazing DIY scrap wood projects, check out woodworkingtoolkit.com.
3. Circular Lazy Susan
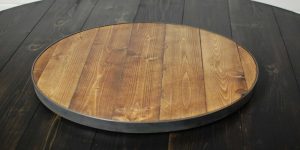
This is another project you can make with 1×4 or 1×6 boards. Your lazy susan should have a diameter of 14 inches. To make it, take a 1×6 board, measure it and mark it at 14 inches.
Cut three 14 inch long pieces by saw, and lay them together. Make sure your boards have sharp edges on the side. Some boards have rounded edges and can create indents on the surface once you join them.
To mark the circle, you can use a 3 or 5-gallon bucket to draw the shape or use a giant compass if you have one. To carve out your lazy susan you can use a jigsaw or a circle cutting jig.
4. Beverage Tote
You can carry around your six-packs or wine in your handmade rustic tote. To customize your tote you can use monograms. The entire piece can be made with a 1×8 board by attaching all the pieces with wood glue.
You can also keep the tote in the bathroom to store dry towels.
5. Laptop Desk
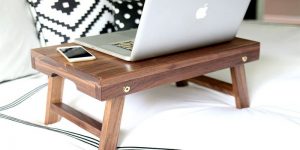
You will need three 1×3 and two 1×4 boards for this. The 1×4 boards will be used as the sides of the desk and the 1×3 boards are going to be the base. Attach the 1×3 boards to the 1×4 board from the right angle.
Use finish screws and wood glue to firmly attach the pieces. Make sure the space between the 1×3 boards is equal. Attach the last 1×4 board on the other side and use finish screws to secure its position.
Paint the entire project and you will have a working laptop desk ready to be used.
6. A Simple Shelf
This is easy even for beginners. You can use two 1×4 boards for the edge and 1×6 boards for the shelves. Use one 1×6 board at the bottom as the base of your shelf. Glue and screw all the pieces, and you will be done.
You can have three shelves and even hang them on the wall since the piece will be small and light.
7. Ergonomic Footrest

If you are working for long hours on the computer, then an ergonomic footrest under your desk can be extremely beneficial.
The most important factor here is the angle. Your footrest should have an angle of 10° to 20°. The base should also be wide, so your entire feet can rest on it.
A 1×12 board should be used to measure and cut out the side supports of the footrest. As for the base, use a few 1×3 slats and attach them using finish screws.
8. Paper Towel Holder
All you need is a holder and a 1×6 board. Firmly screw the holder in the board and attach the board to the kitchen wall using command strips. You can use this in the kitchen or dining room.
9. Mallets
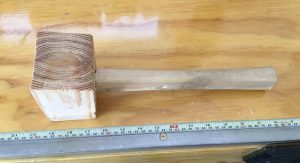
You need power tools such as a miter saw, jointer, and table saw to make a working mallet. First, cut the wood according to size. Use a 5 by 24-inch board, edge-join one side, and cut out a one and a half-inch strip to use it as a handle. The length of the handle should be about 12 inches.
As for the head, you can use the rest of the board to cut three 3-inch pieces, sandwich them together with some wood glue. In the middle piece, you will have to cut out space to fit the handle.
10. Mailbox
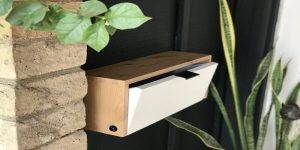
This one is for woodworkers with a little more experience. Get two 1x12x19, one 1x8x19, and another two of 1x8x21 size boards. Cut the edge of the two 1x12x19 boards at 45˚ angles.
Use the 1x8x19 board as the base and apply glue on both sides. Attach the two-edged boards on two sides and use finish screws to secure them in place. Last, use the remaining 1x8x21 boards as the roof. The edged surface will allow you to attach these two boards nicely.
Final Thoughts
Woodworking can be a fun and relaxing activity. Once you are done with larger projects, do not just throw away the scraps. Instead, try creating any of these items with the leftover wooden pieces. You can use these items as decorative or gift them to your friends and family.